
15/02/2016
Managing your cool box
The following information is primarily about standard, insulated cool boxes that do not run off electric. There are such things as electric cool boxes too, see below.
Note on 12v/electric mains cool boxes:
An electric cool box does not work like a fridge, if you expect ice cold wine, beer or water you will be disappointed. They tend to work at 16 to 18 degrees below ambient. So you get a 22 degree day, the cool box will keep food to 6 degrees. Your fridge at home is around 3 to 5 degrees. You can buy, for £180 and upwards, a camping fridge that works off electric or gas and will cool things just as well as your home fridge does.
Rule #1 Start four days before you need the cool box.
There's no point packing your cool box on the day you go camping, filling it up with food and expecting a few ice packs to do the job. Start about four days before by putting frozen 2 litre bottles of tap water and ice packs in the cool box, preferably enough to fill the space. If you don't have enough to do that, fill up the empty spaces with bubble wrap or even scrunched up plastic bags. No empty spaces please!
When the bottles thaw, replace them with new ones and also new ice packs. This second lot won't thaw just as quick. This is called 'priming' your cool box.
Rule #2 Fill up with frozen food.
Did you know milk freezes really well? Make a Chilli or a Spaghetti Bolognese before hand and freeze these too. It'll take a day or so to thaw out but then dinner for night two is sorted! Frozen bacon and sausages means day 3 breakfast. Ensure all other food is at least chilled in the fridge. Don't put room temperature food in the cool box that you've been working on getting cold for the past few days.
Rule #3 Don't open the cool box!
Consider using a second cool box for drinks and snacks (such as chocolate bars) so that you are not opening your main cool box every five minutes. Especially worth considering if you have kids! You can buy a second, budget cool box for this purpose, or you can double line an ordinary cardboard box with bin liners, put tin foil all around the inside, fill with ice and your drinks and drape a wet tea towel on top. Keep a smaller container of milk in here too if you are a serial coffee or tea drinker.
Rule #4 Buy often, buy local.
Don't bother trying to manage your weekly groceries like you would at home. When you go out for the day, plan a trip to the butchers or shop on the way home and buy just what you need for that evening and the next morning. Don't give the sausages time to go off.
Rule #5 If the campsite offers ice block freezing, use it.
Even better ask them to freeze two litre bottles of tap water AND ice packs. Even when the water starts to thaw, it will be lovely and cold to drink. They may even have a fridge for campers to use, in which case make sure you have a permanent marker pen to hand to put your name on everything!
BONUS TIPS!
Tip #1 Fill up with ice.
Ice is really cheap, I've seen it for 99p in some shops. You can double bag the ice to stop it from soaking everything, although chances are it will to some extent. A cool box with a plug at the bottom is especially useful if you use ice. Having some ice in freezer bag means ice for drinks too! It is unlikely you'll want to use the dirty ice that is swilling around the bottom of your cool box.
Tip #2 Mind how you pack.
It goes without saying heavy things to the bottom and lighter things at the top. Even if you are not using ice, condensation means the bottom is most likely wet. Plastic containers such as milk or bottled drinks, or even tins (beer, soda etc) are best placed in the bottom with butter and eggs on the top. Try not to have packaging with cardboard in it near the bottom as it will become wet through.
Tip #3 Vac pac.
Your butcher will likely have an industrial type vacuum packer, and most will be happy to vacuum pack your meat in portions if you explain that you want it for a camping trip. The meat will last longer, and the packaging will not leak. If you freeze it before hand it will act like a ice pack as well.
Tip #4 Wash lettuce before you leave home.
And place in a ziploc bag along with a single sheet of damp paper towel, you should get at least three days out of it. In fact, much of your veg preparation can be done at home and stored in ziploc bags. Double bag chopped onions or everything will smell!

Note on 12v/electric mains cool boxes:
An electric cool box does not work like a fridge, if you expect ice cold wine, beer or water you will be disappointed. They tend to work at 16 to 18 degrees below ambient. So you get a 22 degree day, the cool box will keep food to 6 degrees. Your fridge at home is around 3 to 5 degrees. You can buy, for £180 and upwards, a camping fridge that works off electric or gas and will cool things just as well as your home fridge does.
Rule #1 Start four days before you need the cool box.
There's no point packing your cool box on the day you go camping, filling it up with food and expecting a few ice packs to do the job. Start about four days before by putting frozen 2 litre bottles of tap water and ice packs in the cool box, preferably enough to fill the space. If you don't have enough to do that, fill up the empty spaces with bubble wrap or even scrunched up plastic bags. No empty spaces please!
When the bottles thaw, replace them with new ones and also new ice packs. This second lot won't thaw just as quick. This is called 'priming' your cool box.
Rule #2 Fill up with frozen food.
Did you know milk freezes really well? Make a Chilli or a Spaghetti Bolognese before hand and freeze these too. It'll take a day or so to thaw out but then dinner for night two is sorted! Frozen bacon and sausages means day 3 breakfast. Ensure all other food is at least chilled in the fridge. Don't put room temperature food in the cool box that you've been working on getting cold for the past few days.
Rule #3 Don't open the cool box!
Consider using a second cool box for drinks and snacks (such as chocolate bars) so that you are not opening your main cool box every five minutes. Especially worth considering if you have kids! You can buy a second, budget cool box for this purpose, or you can double line an ordinary cardboard box with bin liners, put tin foil all around the inside, fill with ice and your drinks and drape a wet tea towel on top. Keep a smaller container of milk in here too if you are a serial coffee or tea drinker.
Rule #4 Buy often, buy local.
Don't bother trying to manage your weekly groceries like you would at home. When you go out for the day, plan a trip to the butchers or shop on the way home and buy just what you need for that evening and the next morning. Don't give the sausages time to go off.
Rule #5 If the campsite offers ice block freezing, use it.
Even better ask them to freeze two litre bottles of tap water AND ice packs. Even when the water starts to thaw, it will be lovely and cold to drink. They may even have a fridge for campers to use, in which case make sure you have a permanent marker pen to hand to put your name on everything!
BONUS TIPS!
Tip #1 Fill up with ice.
Ice is really cheap, I've seen it for 99p in some shops. You can double bag the ice to stop it from soaking everything, although chances are it will to some extent. A cool box with a plug at the bottom is especially useful if you use ice. Having some ice in freezer bag means ice for drinks too! It is unlikely you'll want to use the dirty ice that is swilling around the bottom of your cool box.
Tip #2 Mind how you pack.
It goes without saying heavy things to the bottom and lighter things at the top. Even if you are not using ice, condensation means the bottom is most likely wet. Plastic containers such as milk or bottled drinks, or even tins (beer, soda etc) are best placed in the bottom with butter and eggs on the top. Try not to have packaging with cardboard in it near the bottom as it will become wet through.
Tip #3 Vac pac.
Your butcher will likely have an industrial type vacuum packer, and most will be happy to vacuum pack your meat in portions if you explain that you want it for a camping trip. The meat will last longer, and the packaging will not leak. If you freeze it before hand it will act like a ice pack as well.
Tip #4 Wash lettuce before you leave home.
And place in a ziploc bag along with a single sheet of damp paper towel, you should get at least three days out of it. In fact, much of your veg preparation can be done at home and stored in ziploc bags. Double bag chopped onions or everything will smell!
03/01/2016
Vango Iris, a brief history
The Vango Iris is a sub £300, 3 poled tunnel family tent that is pitched in 10 to 15 minutes. It has had a name change from Icarus to Isis, oops, and quickly to Iris - but it is basically a good value, well engineered, great value piece of camping kit with a sales performance that other tent manufacturers can only try to emulate. Year on year, the tweaks in the design are tiny. If it ain't broke and all that.
Back to the beginning
2008 was a influential year in many ways. Global recession meant an end to expensive holidays for many, redundancies meant no holiday at all. Alternatives were sought, and camping was remembered in a golden halo kind of way. A couple of reasonably warm summers, and camping was suddenly all the rage again. The dome tent, which had dominated the market for existing campers, had grown to monster proportions and took up too much room on a camp site, and also took too long to put up. My brother in law bought a pro-action, a central dome thingy with three sticky out bits to sleep in. It took hours to put up and it put him off for life. To this day I cannot get him to try camping again.
Tunnel tents were the answer, and Vango just got it right. Where other companies had armadillo type tunnel tents, Vango kept it simple. Keep the size down, the capacity to 5 or 6 people, have it with three poles, all the same length so it didn't matter which pole sleeve you put it through. Put plenty of pockets in there, and make sure, for goodness sake, to put a fully sewn in groundsheet in the damn thing (deal breaker for many non-camping people). And most of all, keep it affordable. Vango claimed to have lost money on the thing, although I'm sure they have recouped the costs by now and just as importantly, their brand is now considered right 'up there'.
Outwell quickly brought out their own versions, with better and stronger materials and a bigger price for the slightly more affluent camper. The Vango 3 poled tunnel tent still remained the favourite mainly because of the price, as families were either broke or faced with being broke or worried about being broke in the future.
The TBS System
A Vango Icarus/Isis/Iris looks a bit like a polytunnel you grow your veg in. Except the poles are in sections and to keep weight and price down, not particularly strong. In any kind of a breeze the tent was a wobbly mess. To counteract this the engineering principle of triangles being stronger than half moon shapes, a series of webbing straps were designed in. They originated in each side and clipped in to a point on the apex. Because these straps were then in the way of users, it was left optional if you wanted to use them or not. A neat little pocket was sewn in to hold the webbing straps and if the wind picked up, the camper could then utilise the system. Since, the TBS system has remained, was tweaked and called TBSII. It is patented, so nobody else can use it.
 |
| TBS * |
Price
In 2008-10 you could pick up a three poled Vango for about £170. There was a blue version and a green version. Each year the colour changed. I have a 'Laurel/Meadow' green 2010. My friend had a 'Smoke' blue one from 2008.
 |
| Early model circa 2009/10, offered in two colours 'Laurel Meadow' and 'Bluebell' * |
By 2011/12 the price rose to about £230 (retail) and in sales reduced to the £200 mark. For the extra money the spec was significantly enhanced. The strength of the fabric was better (embossed with a 'V' for Vango) but the basic construction remained the same. The inner pod, which was white, was swapped out for a 'Lights Out' darker fabric.
The window design changed to match some of the bigger Vango models, called the Vista front, basically it gave a better outlook and more light in. The ventilation was enhanced so that there were high and low ventilation points to aid in the circulation of air. The optional mesh panel on the door was extended to the front door as well as the side. The privacy curtains were zipped not toggled.
This year you can expect, for around £260, all that plus 'line lok' guyline runners (which are significantly better than standard ones) and velcro tidies to run the cable of the light up to the roof. These are little things, and if I bought one last year I would not be upgrading just for these things alone.
 |
| 2016 model in Moss Green * |
The canopy
What a rigmarole we have had with these canopies. Everyone but everyone who had a Vango Icarus wanted the canopy only in the early days there wasn't one. Well there was a 'universal one' which nearly but didn't quite fit (called the Premium Extension) which was actually designed for another tent (the Vango Orchy) but Vango caught themselves on and brought out dedicated 'fit on the front' canopies - first of all open fronted, then with a door on (more sensible and less 'kitey') and eventually designed one that attached with a zip. But by then the canopy rage was over as people just went out and bought a slightly bigger tent instead. The other tent manufacturers, by contrast, were a lot quicker off the mark with add ons and extensions. Gelert and Hi Gear in particular, were early adopters.
The future
I predict that the Vango Iris will continue to be a firm family favourite this year, although I feel that the popularity of camping has peaked and is now waning. A couple of washout summers have quite literally dampened the mood and all those new campers have been put off.
The cheap alternative
The need for a really budget tent is still catered for with a Vango Lauder which has no side door and has less head height in the bedroom pods, as well as a linked in groundsheet rather than a sewn in one. If you can live with that then for about £160 you too can go camping this summer, which I predict, will not be as wet as the last one.
* All Images copyright Vango
05/11/2015
Bell Tent thoughts
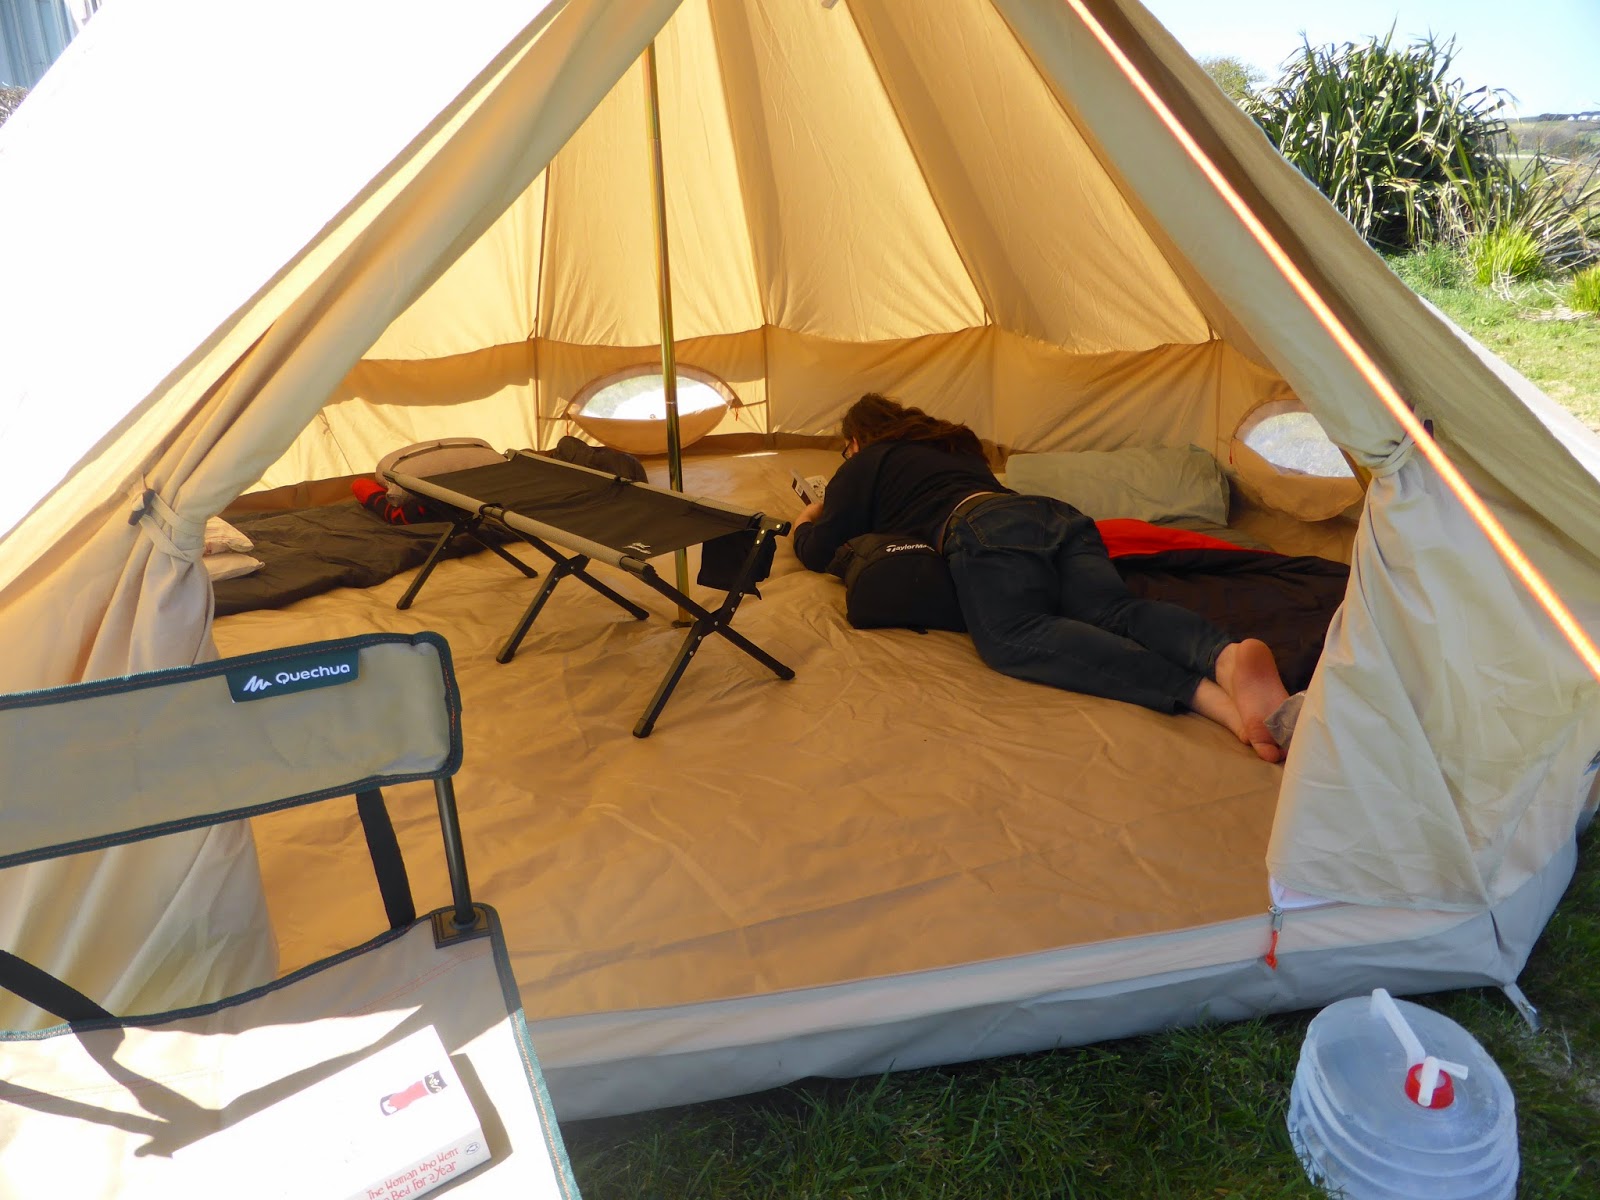
Last spring I treated myself to a Bell Tent, I sourced a 4m Polycotton from a German company called Spreen and was happy with the price. It is a 'SIG' ie sewn in groundsheet and it is 2.5m tall in the centre, leaving plenty of head room to walk around with. When I first got it I was distinctly unimpressed, I found the high space difficult to heat, the door being low was hurting my back, the single guy rope outside the door was problematic. Find original post here.
I then braved a stormy weekend still quite early in the season, when I went to Creeslough in Co. Donegal. What I liked about the tent was it looked cool, there's no doubt it's a pretty tent. It was the talk of the campsite! But wet, it was a heavy beast and I didn't have the strength to pack it and one thing became apparent, the bag which was a snug fit when the thing was brand new vacuum packed from a factory in China, was far too small when packing it away normally and worse when wet. Find that post here.
The next time I could have used my new Vango Halo, but the Bell Tent has a way of making you want to use it! Bell Tent camping is a whole different experience to any other kind of camping. It is something you hanker after, and miss when you don't have it. I solved the guy rope in the door way problem by getting a similar coloured guy rope to match and put two on the guy point, and pegged them out at a 45 degree angle so that there was one on each side instead of one in the middle. As the outside temperatures rose the benefits of having a cool space inside a tent (which in a full polyester fabric would heat up like a sauna) became apparent, and excess heat could be controlled by opening the half moon, mesh covered windows in the sides. I could not fault the pitch time of about 8 minutes. That time I had a helper in the form of my very nearly adult son who very much aided with the folding up process and the hoisting it over the lip of the car boot bit. And, I abandoned trying to get it in it's bag, using two long velcro straps to secure it into a package instead. That post can be found here.


I last used it on a meet with some camping friends. I hardly got to spend any time in it, but there was some hilarity as the guy ropes, which do have to be pitched extended quite far out, turned out to be a trip hazard for drunk people. Over the course of the weekend the tent looked sadder and baggier, until I took pity on it and took it home one last time for the season. Find the post with pictures here.
Now I've used it a reasonable amount of times, I can honestly say the charm has been worked on me. I don't know what it is about Bell Tent camping, but I don't think I'll rush out to buy a tunnel ever again. I don't even want to! (which is saying something for me as I really, really wanted an Easycamp Boston with a flat front for years!). Yes the issues with weight, heat retention etc is still there. It is partly about appropriate use. For example, when it's cold out, use a smaller tent. My Vango Halo, which I'm also very happy with, is the perfect small scale tent for keeping heat around you when you are sleeping. When it's raining, take something (such as my Base Seconds from Decathlon) which is big enough to hang out in and dries quickly, preferably in my parents garage!
But when you get a golden weekend, the sun shines, the breeze is gentle, the views are great, Bell Tent camping has a personality of it's own that makes you want to seize every minute and relive it weeks and months afterwards. I think it's the slightly hippy, dippy nature of it that reminds me of more carefree days. And, I've discovered that the best way for me to enjoy it is to not worry about prettying it up, in fact the more glamping I do, the more pressure I feel to keep it just so!

I combined Bell Tent camping with a paring down in all other areas. The cooking was confined entirely to one blue stripy container (see pic) and smaller and better items. The big chair was swapped for a sturdy small one, and a light folding bench. The big table was dispensed with in favour of a Coleman Mini table, and if there was a handy picnic table available, then none were required.
Now all I want, or need is a Ghillie Kettle!
10/08/2015
A quick kit list for newbie Campers.
This list is specifically for a couple, who are thinking of throwing a few things in the car and heading off on a mini adventure, It is inspired by an overnight camp I did in Corgreggan Mill, near Dunfanaghy. The nicest, craziest, most ill prepared couple came along and camped nearby me and I nearly wet myself when they tried to get a double airbed into a tiny, single skinned pop up tent. They were like an upturned turtle and the pair of them were in fits of hysterical giggles. We parted friends and it is in tribute to them that I write this post.
Tent
Editors Choice Camping Magazine Awards 2014 chose this tent for good reason. It costs a shade under £120.
The Quechua 2 Seconds XL is double skinned, so it will keep you nice and snug in an inner pod which is breathable, will wick away all the condensation from your breath and will prevent your bedding from coming into contact with the waterproof outer tent. The tent is a pop up, so is easy to put up and although there's a knack, just as easy to put away.
It's small enough you can probably dry it out in your living room when you get home. It's big enough to let you sit up in comfort, and gives you the space to get changed. It's super strong, even a strong wind will only flatten it but it will not break it. This particular one even has a built in light.
It's a three berth tent which makes it better for two people because tent manufacturers are always a bit on the mean size when it comes to calculating how much room a person needs, and it has a porch for your smelly shoes, your clothes bag or for storing that little backpackers stove you've picked up to make a cuppa with.
QUECHUA 2 SECONDS XL III ILLUMIN FRESH POP UP TENT - 3 MAN, WHITE/GREEN

Argos Ready Bed Double
This is a budget solution (about £40 but often on sale) to a double sleeping arrangement in a tent. It is not the best airbed on the market, but then even the most expensive ones are prone to leakage, as anything inflatable is. I'm a fan of Ready Beds because they are one of the few sleeping solutions that have a sleeping bag built in to the design. It is essentially a double sleeping bag with an airbed slipped in to a big pocket on the underside. That means that when you turn around, the bedding stays put, and I find this far more comfortable than struggling with individual sleeping bags that twist around you when you turn. The bed is sealed all around which makes it a better option than taking bedding from home as you will have gaps around the sides which will let warm air out, and cold air in.
The cons of this bed are that the bedding is quite flimsy. This can be offset by taking a big throw or fleecy blanket from home. And you'll be together, so you can keep each other warm.
The dimensions of the bed are 180cm by 132cm. Considering the above tent has a sleeping area of 210cm by 210cm there's plenty of space left over.
Ready Bed Double from Argos currently £28

Extra Insulation
As airbeds are essentially a big bag of cold air, if you have it adjacent to cold ground then the result will be that you will possibly get quite chilly. Counteract this by using a layer of insulation underneath the airbed. This can be something like cardboard from a local shop, or a foil backed picnic blanket. A few pounds spent on foam camping mats, or even yoga mats will help enormously.
These Yellowstone mats from Amazon are foil backed which will help reflect your body heat back at you. They are about £6 each and you will need two for putting under a double airbed.

A free alternative, other than the aforementioned cardboard, is if you are installing some laminate flooring at home keep a bit of the insulating layer that you put below the laminate for under your airbed. If you really have nothing else, a couple of newspapers spread out will be better than nothing.
Seating
A very basic seating area can be achieved with a picnic blanket. I think that if you are just trying this camping lark out and you are young and reasonably fit, you can't go far wrong with a picnic blanket as your seating solution for your first camping adventure at least. Then, if you really like camping you can start to look for camping chairs.
These picnic blankets, from Home Bargains are £4.49 each.

I haven't touched on cooking or basic tea making facilities, because in my eyes you start to get in to a whole lot of extra equipment. However I would recommend taking snacks, drinks and a picnic and store food in an airtight container to minimize attracting wild life into your tent. You will probably find you eat out in the evenings at least. Just go, enjoy and if the weather turns bad shove it all in the car and go home. There's always next weekend!
05/08/2015
Sunflower Festival 2015
The Sunflower Fest has come of age. No more are we the punters struggling with unnecessary hardship, the place was clean, the portaloos were plenty, the mud was minimal despite some rain. The bands were fantastic, the food was plentiful and varied, and the outer corners held some special little spaces that you came across by surprise such the Coconut Water Bar, a lovely little chill out spot.


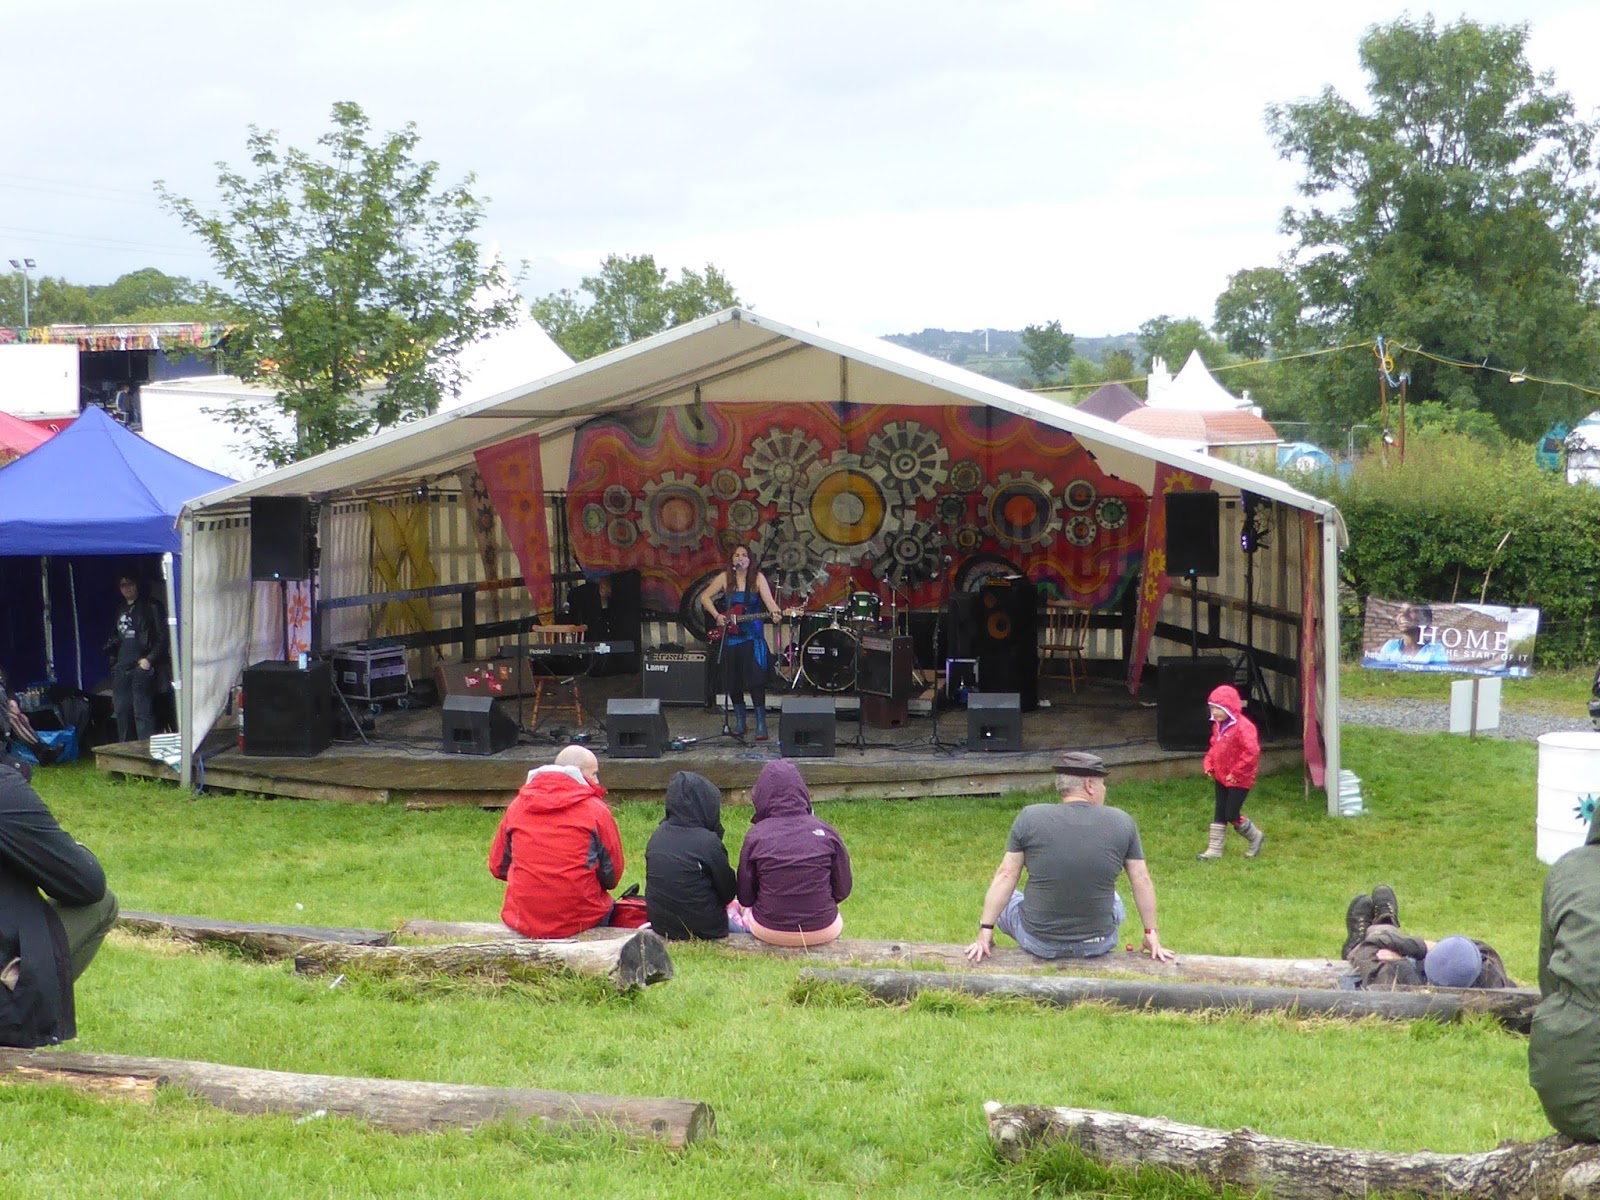
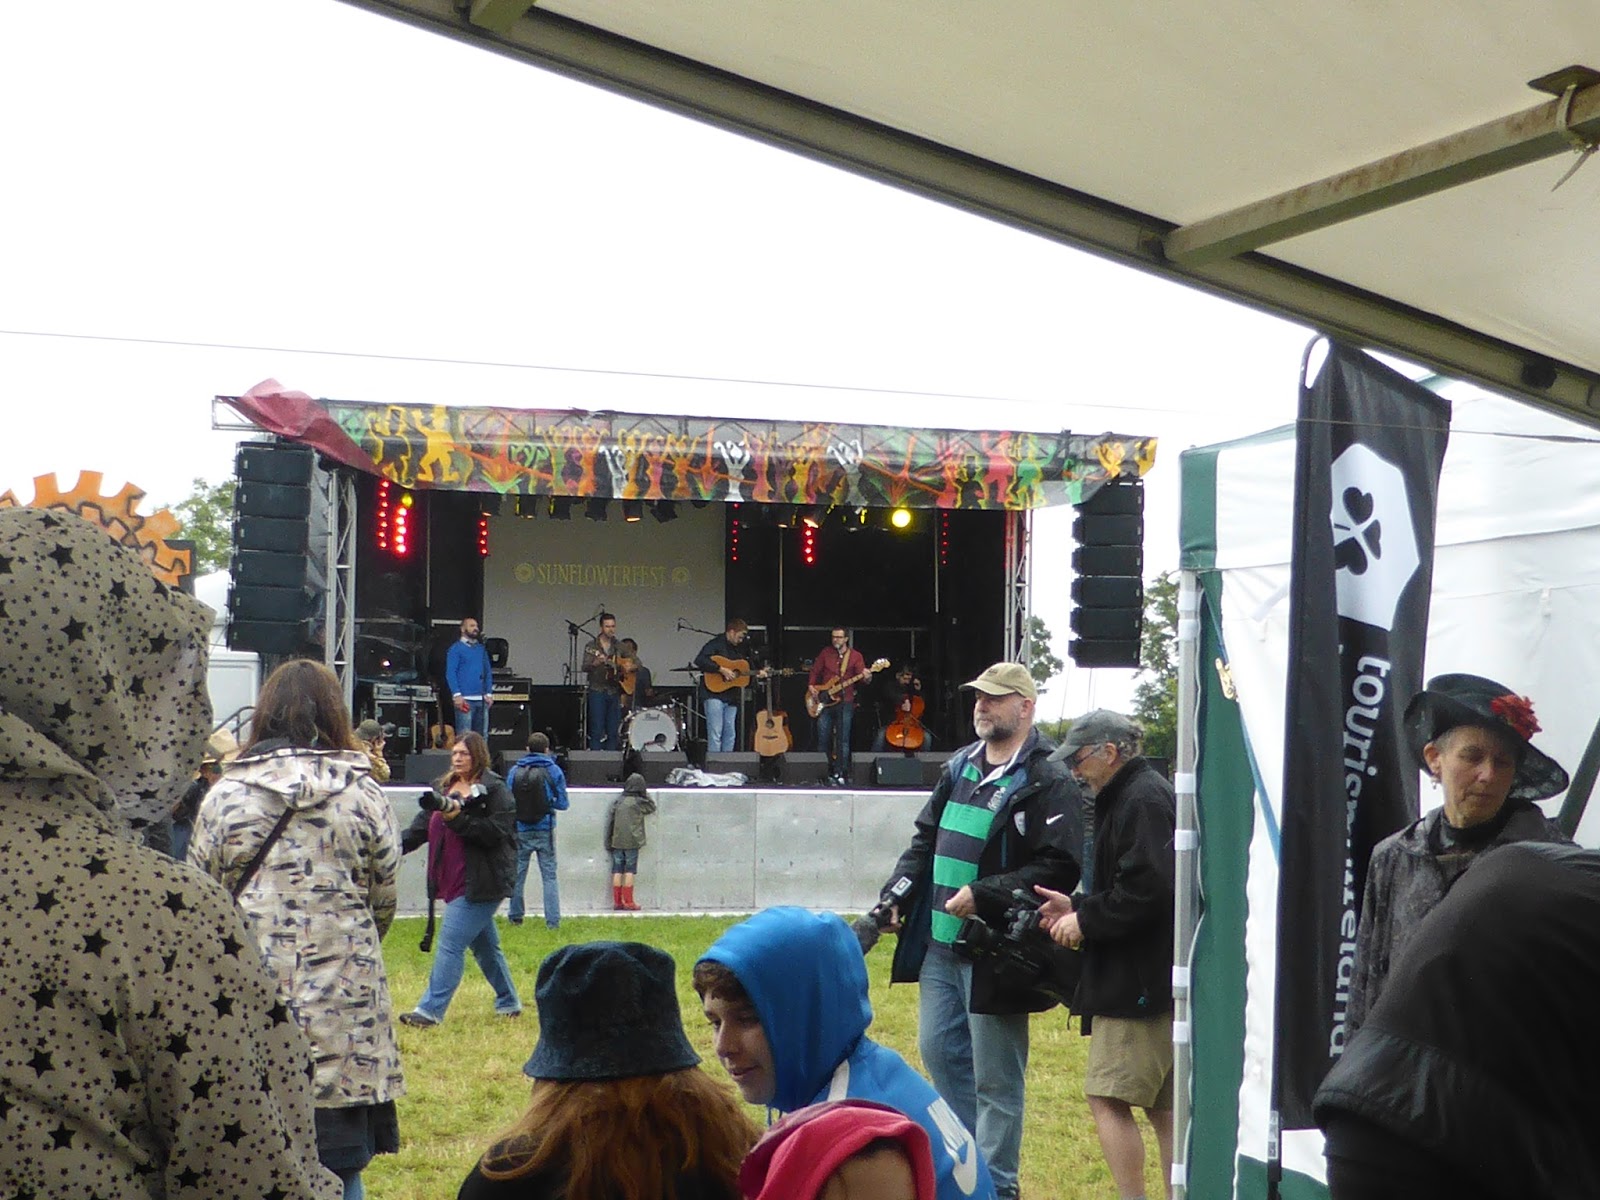
There were lots of little tweaks. The main stage used to have an undercover area to one side that was VIP only, now opened up to all who needed it as a shelter from the rain. A Marquee right beside the sound tent (mid centre of main arena) that used to be occupied by a frankly dodgy burger vendor who took up most of the space for his customers, has been vacated with just a few simply constructed low tables that served as seating and/or coffee table, under cover and out of the elements. The hot food vendors lined the sides of the field in the main arena and the prices were reasonable.No more is the guy that served one slice of pizza and a can for a fiver - now you can get a whole pizza, any topping for a tenner. Also on offer was barbecue sticky ribs, a Burrito Bar, traditional Chippy, Thai and down in the 'Bliss' Valley vegetarian Falfatel.
The band of the whole weekend, in my opinion, was a band called The Screaming Eagles. They are a bluesy rock band that are sharing stages these days with such big name bands as Airbourne and Black Star Riders.

The second best band was called 'The Love Street' hailing from Cornwall, with a surprisingly celtic rock flavour and who won over the crowd with a rousing rendition of 'Whiskey in the Jar', always a winner in my book.
The Camping Bit
My eldest son and I carried everything in on one run, using a decent trolley and a crap one. The crap one really let us down and will be replaced before we take this type of thing on again. The little wheels just weren't up to uneven stones and grass. We'd worked really hard to condense all we'd need down to as little as possible, and decided to take the Quechua Base Seconds with the optional inner you can buy, to serve as our 'home' for the weekend. In hindsight, considering the weather could only be described as iffy, it would have been better to take something a bit more spacious.
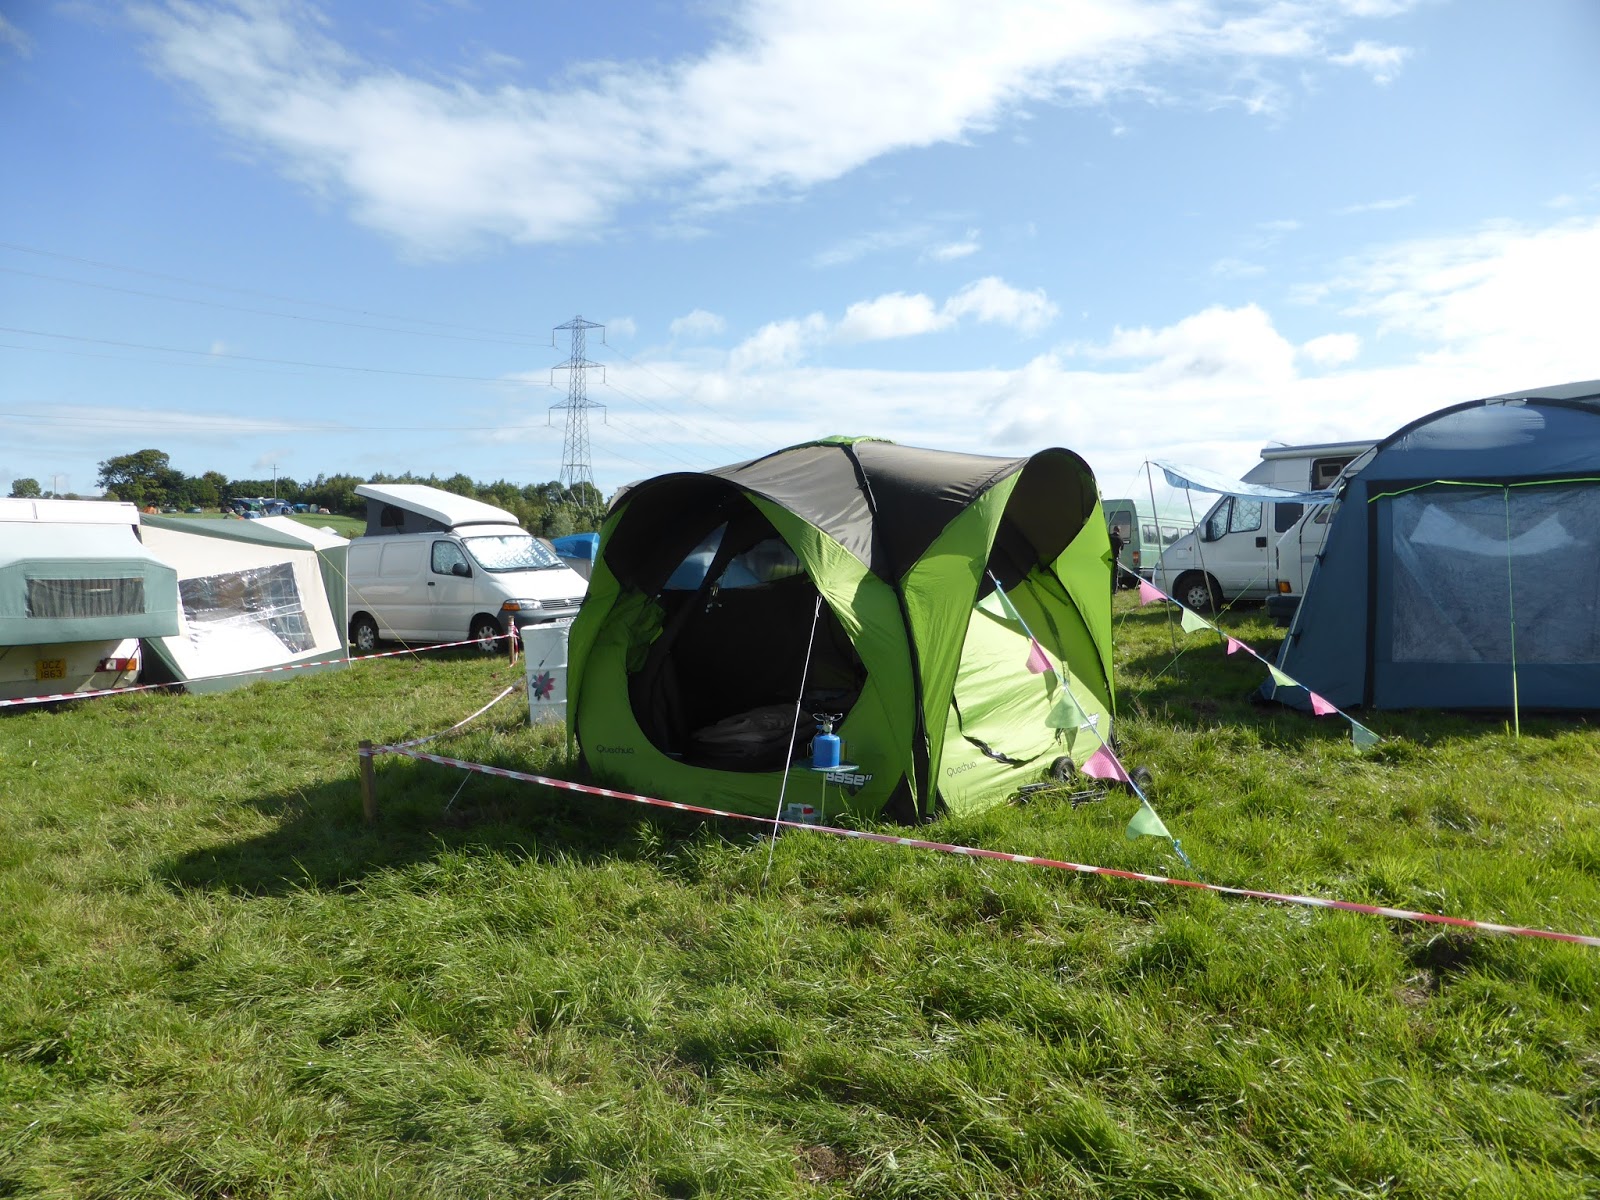



In all it was a lovely weekend and although we were tired at the end we were happy and a bit smelly. I met a lady called Denise who I'd corresponded with on Facebook prior to going and who turned out to be camping right beside me. She was working hard as a volunteer and I would consider doing volunteering there in the future, now that they seem to have sorted out all the teething problems five years in to the start of running this festival.
26/07/2015
Pegs, Pegs, Pegs!
It's common sense to have a few different types of pegs for camping to cope with different soil conditions and to cope with the stress put on the peg by stormy weather. In most cases the tent is actually standing upright only because of pegs. I cannot stress how important they can be especially in bad weather conditions, where they could potentially save you from injury or worse! (Edit: what could be worse? Well your tent could blow away, and for me that would be a fate worse than death)
A tunnel tent for example, is not a self supporting structure. A dome tent is, but a Tepee or Bell Tent only has one pole, and the pegging points give them their shape. So pegs and guy ropes are essential.
A tunnel tent for example, is not a self supporting structure. A dome tent is, but a Tepee or Bell Tent only has one pole, and the pegging points give them their shape. So pegs and guy ropes are essential.
My advice is to have a selection of wire pegs, yellow plastic pegs, V pegs and Rock pegs at the very least. Add in a couple of Delta Ground Anchors and you are ready for anything. You also need a rubber or wooden mallet, and a claw hammer.
Here are a few different types and their uses:
 |
| Wire Pegs |
Wire pegs are flimsy and bend easily. They come with your tent when you purchase it and although they vary in quality they are mostly good for spare pegs, or lending out pegs. They are not suitable for guy ropes unless used in mild weather wth no wind but you can use them to peg down the main tent, although best to use something a bit heavier like a V peg for the corners of the tent. You can sometimes get away without using a mallet, as you push them in with your hand or drive it home with the sole of your shoe (needs must!). You can buy replacement packs for a few pounds, and discount shops like B&M Bargains will do a pack of 10 for 99p.
 |
| Rock Peg |
Rock pegs are like very long nails and you need a claw hammer to bang these in to the ground. They are designed to go through stony or hard ground and come in a variety of colours, most commonly green but also a glow in the dark yellow. They are very good in stormy conditions and are a must have in my opinion. They are a bugger to get out though, so keep that claw hammer ready as the back of the hammer is great for levering these things out. A pack of 6 will come in around a fiver. In Halfords they are called 'Ground Hogs'. There is also a screw in version which you can insert in to the ground with a drill and Blue Diamond and Kampa both make screw in versions.
 |
| Plastic Pegs |
These pegs nearly always come in yellow, and they are made from a rigid plastic. Because they are thicker they have a lot of grip on the ground and are ideal for soft muddy ground. They are also the peg to use on sand or sandy ground so if you are pitching a windbreak on a beach and need to add guy ropes to the windbreak, these are the ones you'll need. In soil you will need a mallet but in sand you can probably push them in. They are cheap at about £3 for a pack of 6.
 |
| Steel V Pegs |
I use Steel V Pegs in the corners of my tent, and also on guy ropes. They are wide, which increases the surface area that is in contact with the soil. They will power, with a good amount of whack, through stony soil and hard ground. Some tents will come with a few of these as part of the pack. They also come in Titanium for weight conscious backpackers. You will need a mallet to insert these into the ground, and either a peg puller or the back of a claw hammer, to get them out again. A pack of 5 if currently £4 on Amazon Uk.
 |
| Delta Ground Anchors |
These are the life saver pegs. These Delta pegs come in to their own in windy conditions. In soggy soil, they are wide enough to provide some grip. They are designed in such a way that the more pressure that is put on them from the guy rope, the further they embed in to the soil. There are metal versions of this peg as well. A few deltas, particularly on the windward side, could seriously save your tent. An additional bonus is that they sit flush with the ground so they are much less of a trip hazard, and the bright yellow means they are still visible in the grass. They are sold individually from Camping World at £2.49 each. I got a pack of 10 direct from Delta Ground Anchors. You will need something strong like a peg puller or the back of a claw hammer to extract them from the ground.
 |
| Wooden Pegs |
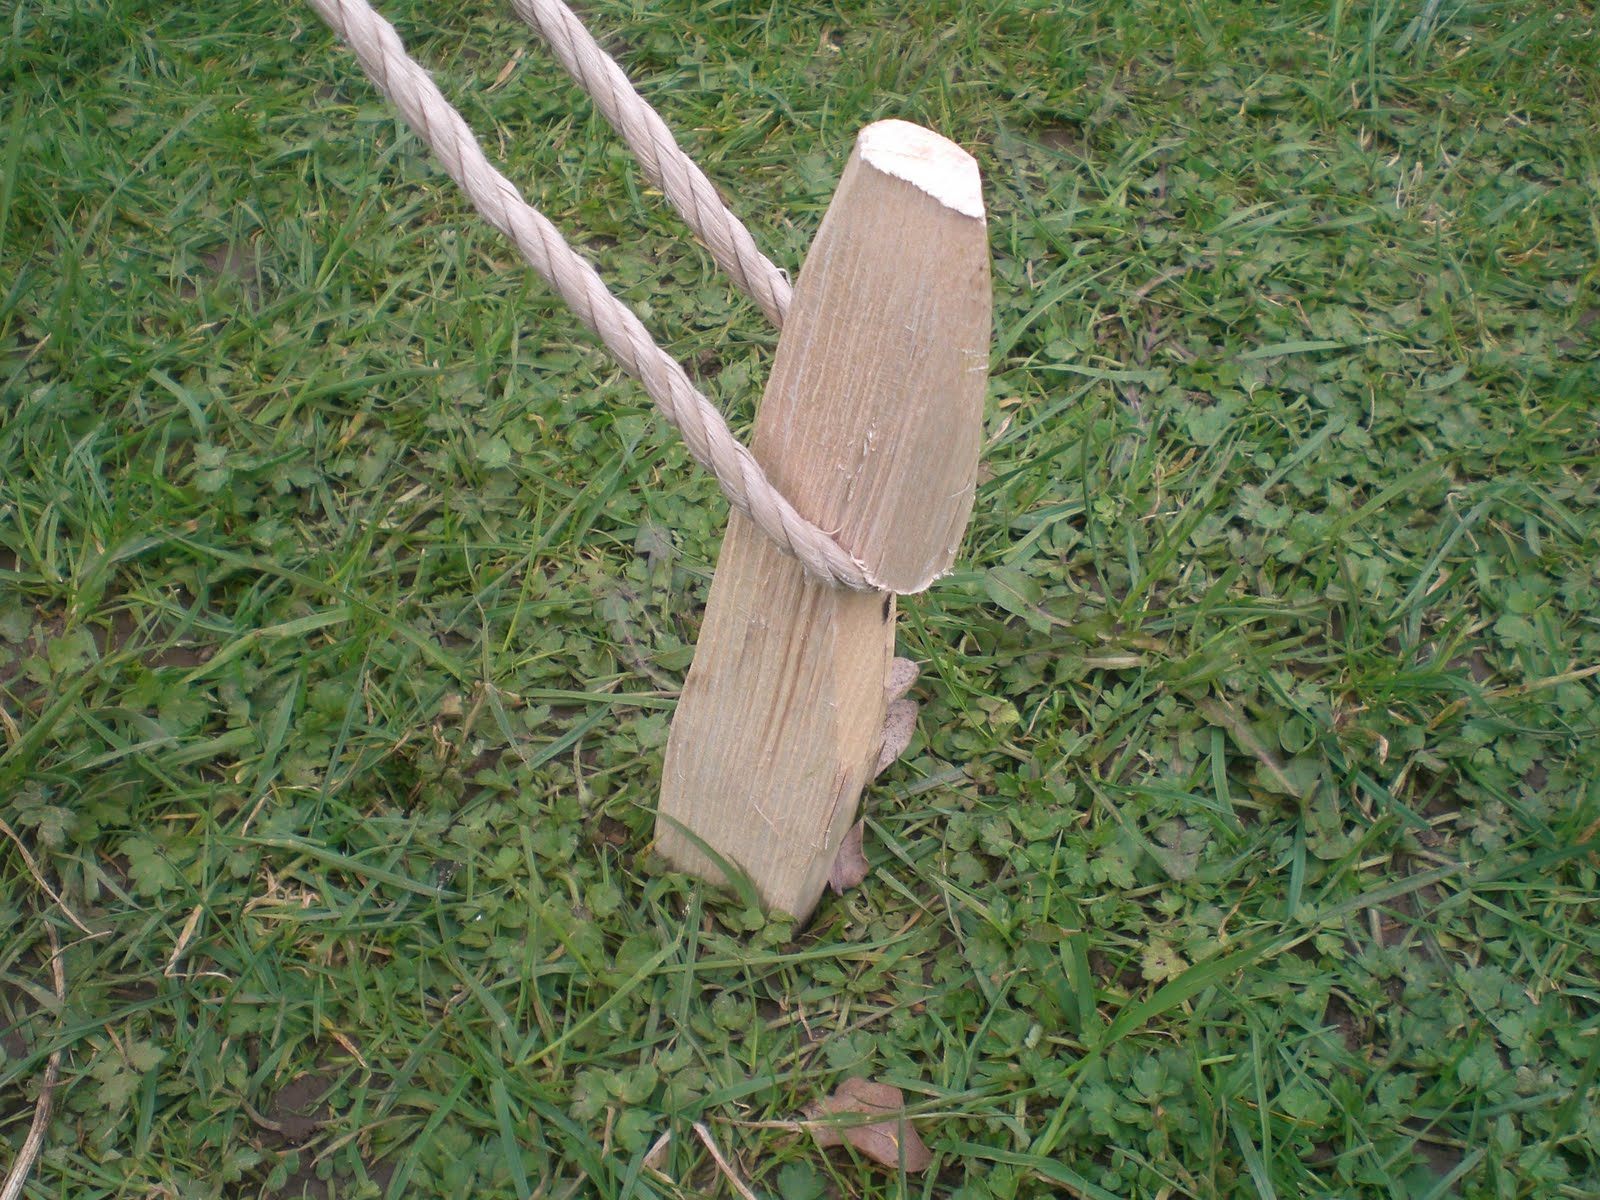
These are the pegs that Bell Tents often come with, and they are stronger and sturdier than most pegs. They appeal to bushcrafters and with a little bit of effort, you can make them on the go out of found wood as long as there is a notch to hold the guy rope in place. Great for windy conditions, they are also good for very churned up 'pea soup' ground as they are driven in to the ground further than most pegs. Free from any forest or about £10 for a pack of 6.

In extreme circumstances, you may want a marquee peg. These are the pegs used to hold down Marquees (funnily enough) but also used by the bouncy castle industry. When would you use these? Well, possibly when you are trying to hold down an awning with a storm strap (wide webbing strap), or when you have extremely poor soil or extremely bad weather. In which case I'd have to question your sanity of camping in the first place. I saw a pack of 4 (38cm length) on Ebay uk for £14.
 |
| Mushroom Peg |
 |
| Groundsheet Peg |
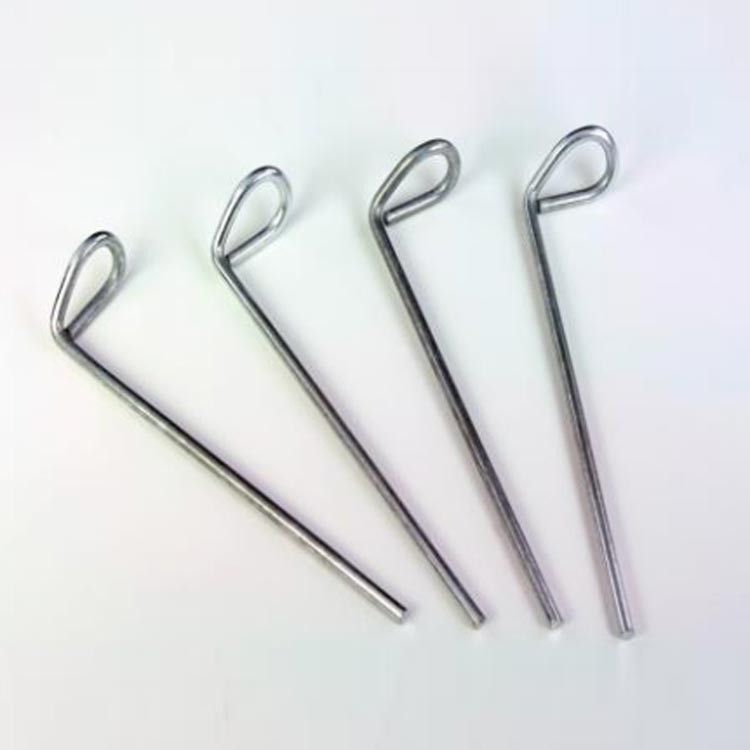
Both these pegs are designed to be flush with the ground, and are ideal for holding down the footprint or builders tarp underneath your tent. They are designed so that you do not trip over them. They are supposed to pushed directly down into the soil, and not at an angle as all the other pegs I have featured are. The Mushroom Peg usually comes in grey. I picked some Mushroom pegs up for 99p in a discount store.
Pegging Methods:
You need to insert your peg in to the ground at roughly a 45 degree angle from the ground to ensure it does not get pulled out by the guy rope as the tent flexes in the breeze.

Cross pegging is a method to increase the strength of your pegs in windy weather. Put the peg slightly sideways on and hammer in. Then insert another peg through the same loop, and in to the same ground surface but turn sideways in the other direction before hammering in. It is incredibly difficult to remove both pegs at the same time as the base of the pegs are spread far apart underground.
21/07/2015
Festival Camping List
 With only a fortnight to go before the Sunflower Festival here is my guide to packing for a festival. Please comment below with your own suggestions.
This could of course be used as a basic camping list for an occasion when you want to travel light or may not have access to your usual transport.
The Sunflower Festival is on at Tubbys Farm, Cabragh Road, Hillsborough from the 31st July - 2nd August. Tickets available on the website.
The Sunflower Festival Website
Festival Camping List
General
Tent of choice – choice of big (stand up height) or small
(easier to carry) and don’t forget pegs and mallet
Bed of choice – foam mat or airbed or self-inflating mat
Airbed pump if using an airbed
Pillows, inflatable or from home
Three season sleeping bag
Waterproof backed Picnic blanket for sitting on and use as
an extra overblanket at night
Eating
Cool box, non-electric and cheap. Fill with ice from
supermarket and a couple of 1 litres of frozen milk. Use as an extra seat or use
as a table for putting stove on (carefully)
Single stove with fuel canister
Collapsible water carrier or 5l sized bottled water from
supermarket
Pan set with optional kettle
Tin opener/bottle opener
Mug per person
Disposable cutlery and paper plates
Roll of bin liners (tip – do not take a whole roll, take a
used ‘thin’ one from home – bin liner can also be used as emergency poncho)
Tea/coffee decanted into a clip top plastic box
Leftover sugar, salt and pepper satchets from your local
eatery in a Ziploc bag
Small Hand Sanitiser (lidl, 79p)
Matches or Lighter
Pot Noodles, rice crackers, breakfast bars, fruit, fruit
loaf, bagels, plastic jar of peanut butter etc etc.
Personal
Lightweight back pack for day use (day pack – Decathlon do a
lightweight one, £2.99 range of colours)
Ziploc bag with your phone inside it
Travel pack of wet wipes
Wad of toilet roll
Paracetamol / prescription meds
Smidge or other insect repellent
Sun cream
Camera
Head Torch
Wallet with one card (pre-paid credit card is safer) and
cash
Ear plugs
Ear plugs
Clothes and Toiletries
Wellies / second pair of resilient shoes such as trainers
Poncho or pack a mac
One change of clothes
Lightweight comfy clothes for sleeping
Jumper or warm jacket
Sun hat
Sunglasses
Dry Shampoo
Travel Wipes
Toothbrush/toothpaste
Optional
Folding chair, preferably one with a carrying strap
Toilet seat liners, ebay £1.30 for 10
Tip – if taking a car keep a clean change of clothes and
shoes for going home in as you may stop off somewhere for a bite to eat on the
way.
Tip 2 - check the weather and if there is any windy weather forecasted, take a smaller tent preferably a pop up tent which will be much more likely to survive gale force winds. The bigger the tent the more surface area which will just pull the pegs out of the ground. Take a selection of different types of pegs especially rock pegs which are longer and stronger than most.
Tip 2 - check the weather and if there is any windy weather forecasted, take a smaller tent preferably a pop up tent which will be much more likely to survive gale force winds. The bigger the tent the more surface area which will just pull the pegs out of the ground. Take a selection of different types of pegs especially rock pegs which are longer and stronger than most.

19/07/2015
Mannix Point, the Return
Details: Mannix Point Camping and Caravan Park
It would be fair to say I am very keen on Mannix Point Campsite. The fact that this is my third visit is testament to that, but it is also a bit of an epic journey for me to get there. It's really an eight hour journey which is not something I have got used to. As per my previous post we decided to break up the journey by stopping overnight in Adare which is a five hour drive, and then we did the last three hours the next day.
- Address: Ring of Kerry, Cahersiveen, Co. Kerry, IrelandPhone:+353 66 947 2806
It would be fair to say I am very keen on Mannix Point Campsite. The fact that this is my third visit is testament to that, but it is also a bit of an epic journey for me to get there. It's really an eight hour journey which is not something I have got used to. As per my previous post we decided to break up the journey by stopping overnight in Adare which is a five hour drive, and then we did the last three hours the next day.
The last three hours of this journey are the worst. Gone are the good roads and along come driving through towns again. The roads are fairly good but you have traffic in every town, and there seem to be quite a few of them. The last major town before entering the 'Ring of Kerry' is Killorglin. From there on the roads are narrower but the scenery more dramatic. A final push on to Cahersiveen and Mannix Point is on the outer edge of the small town, right on the sea front.
The weather in Adare had been gorgeous, and we set up in Mannix Point in glorious sunshine. Then the weather started to be a bit of a problem. I was completely unprepared for it as I'd assumed (hoped!) that the great weather we'd had the previous two times was how it always was in this part of South West Ireland. The following morning we woke to gale force winds and heavy rain, and for about 9 or 10 days out of our 13 days (supposed to be 14 but we went home one day early) it bucketed cats and dogs, and blew a gale.
I had no coat, not even a brolly. I had a jumper which I promptly lost two days in because although I was using it as protection from the rain, it was really too mild for a jumper and every time I was inside anywhere I took it off. I think I may have left it in The Blind Piper (pub) or in Derrynane House (historic house) or in a coffee shop on Valentia Island. Or it could be in the Skellig Michael Visitors centre or a myriad of other places but one thing is for sure, it wasn't at Mannix Point either in the cottage or my tent or my car.
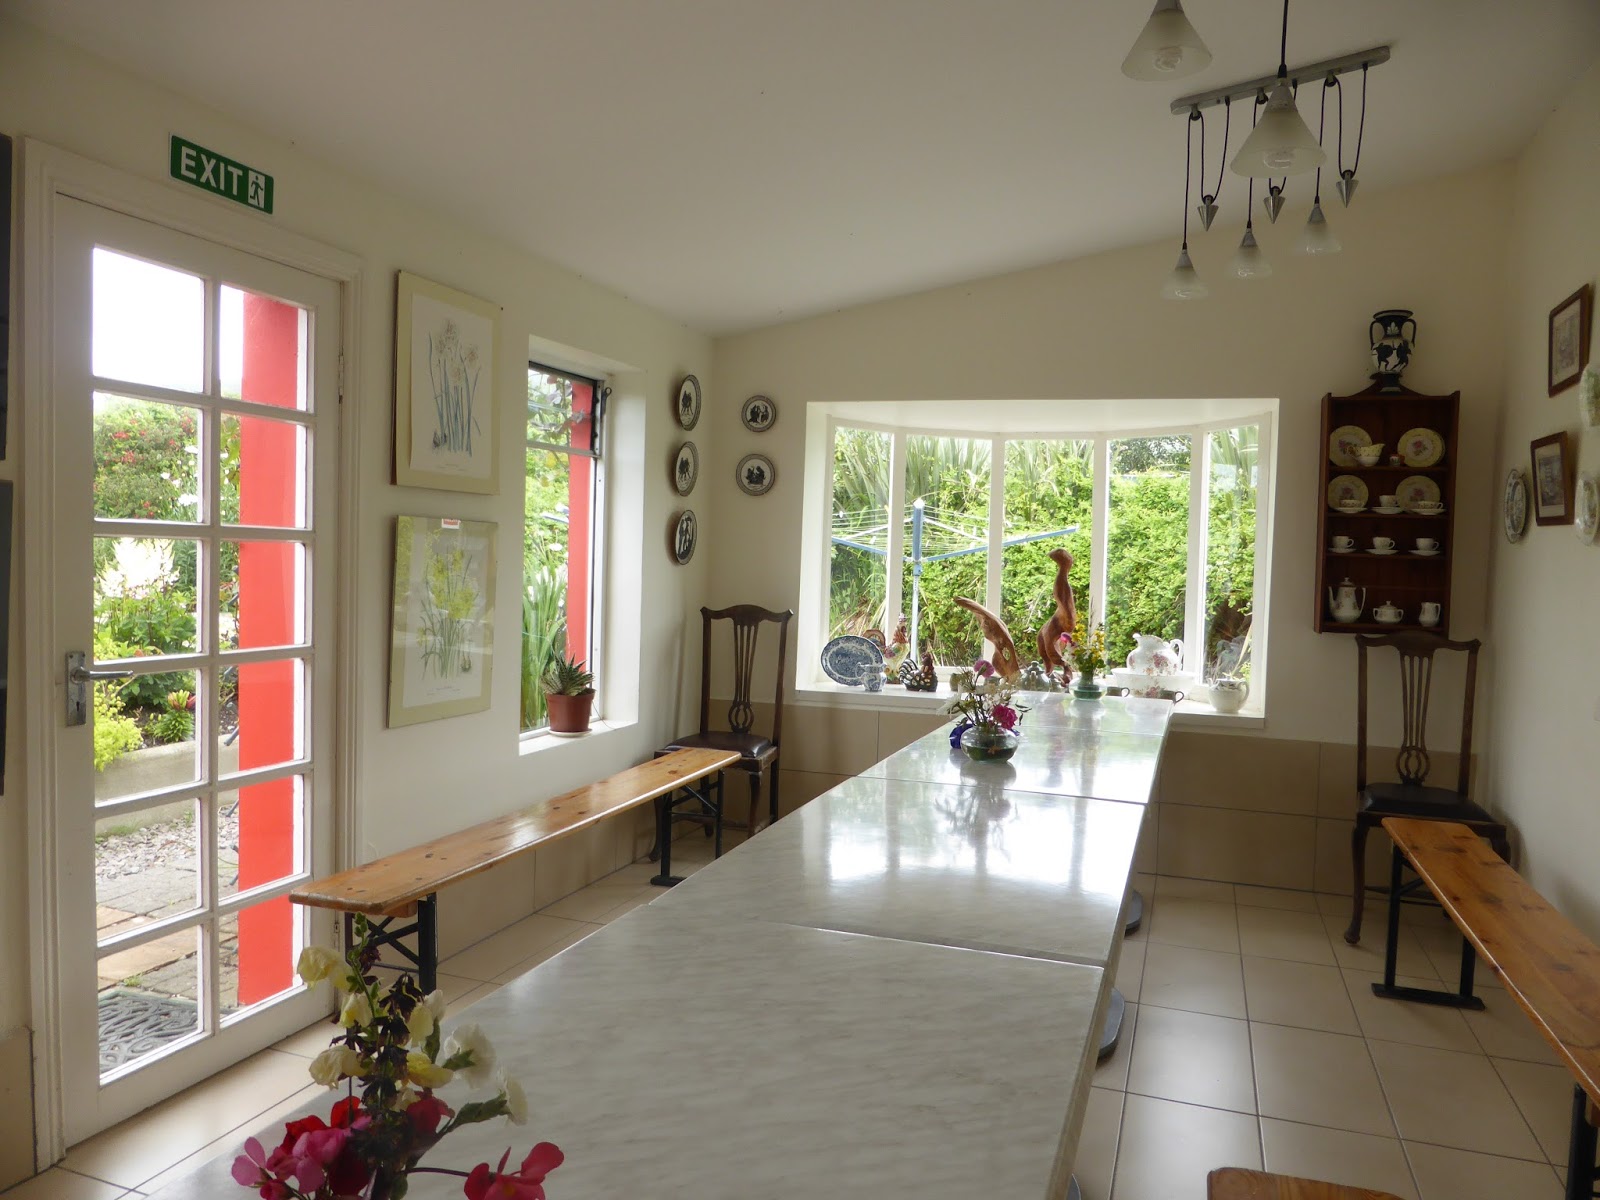
Thank Goodness for the facilities at Mannix Point. I often say this is the best campsite in Ireland, and this is why. The campers kitchen and dining room is the best I've ever seen. The sitting room has a turf fire set every day and instruments for all to play and as a warm, dry place to escape the weather this couldn't be bettered. The staff are fantastic, they are so welcoming and like a family more than staff.
The campsite even won the Tripadvisor Certificate of Excellence this year for the third year in a row which just goes to show I am not the only one with a high regard for the place.
The campsite even won the Tripadvisor Certificate of Excellence this year for the third year in a row which just goes to show I am not the only one with a high regard for the place.
 |
| new, outdoor eating and sitting area under cover |
 |
| Dining Room |
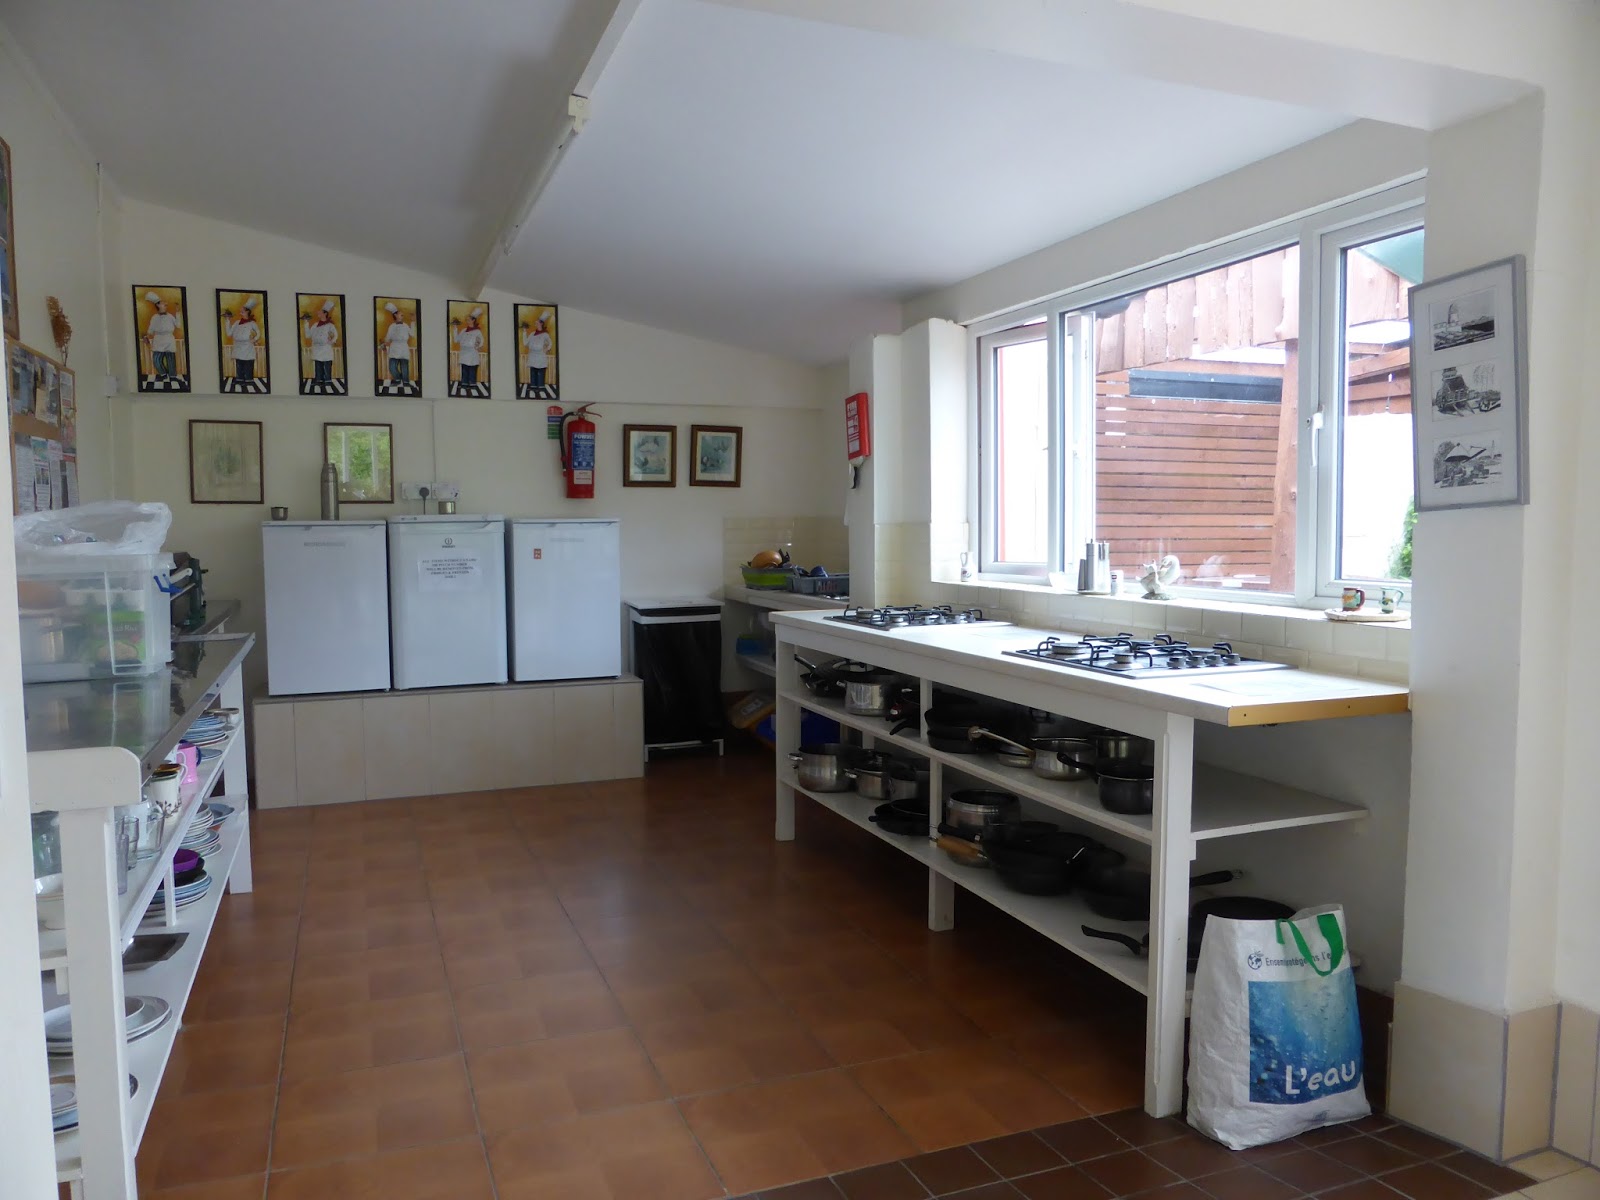 |
| Kitchen Area |
 |
| Raincoats |
We set up our Bell Tent in pitch 6 of 'High Field' which is an all tent section with no hardstandings. We had Electric Hook Up (EHU) and set up our tent so that we both had a sleeping area each with low chairs and a table to hold a light and a radio and other bits and bobs. We had a clothes bag each which were kept adjacent to our own bed area and I dressed up the outside with a bit of bunting. I initially set up a cooking area outside but due to the bad weather we packed up most of our cooking stuff and food into one plastic box and kept it in the main kitchen. There, I was able to use the campers fridge with my name written on the milk etc and many other campers took to doing the same thing. So in terms of breakfast and meals, we went to the cottage to cook and eat and we ate out a bit too. I had my own dishes and pots and kept them clean with my own dishclothes and drying cloths even though these things are provided as well. It worked great in the main but the weather being so bad meant that there was some competition for space in the kitchen at peak times. The kitchen isn't really meant to be used for so many people I suppose, but due to the bad weather everyone wanted to be in it!
We ended up pitching a tarp low to the ground on our pitch to act as a shed, because my chairs, tables etc were getting wet and in parts starting to rust.
 |
| photo taken on our one glorious day, showing our 'shed'. |
It dried up a little bit and on two nights we managed to barbecue and then one day we had a whole day of glorious sunshine where we went to the beach at Caherdaniel and got burnt to a cinder. On another dry(ish) day we went kayaking and then the King Scallop Festival was miraculously saved with pretty good weather as well.
On a wet day we visited the Historic house at Derrynane of Daniel O'Connel, early 19th Century Irish Political force and pacifist. I found the visit much more interesting than anticipated considering we were just looking for something to do to get out of the rain. This property is run by the Office of Public Works (OPW) which is similar to the National Trust. Cheap to get in €4 for me and half that for my son with his student card.
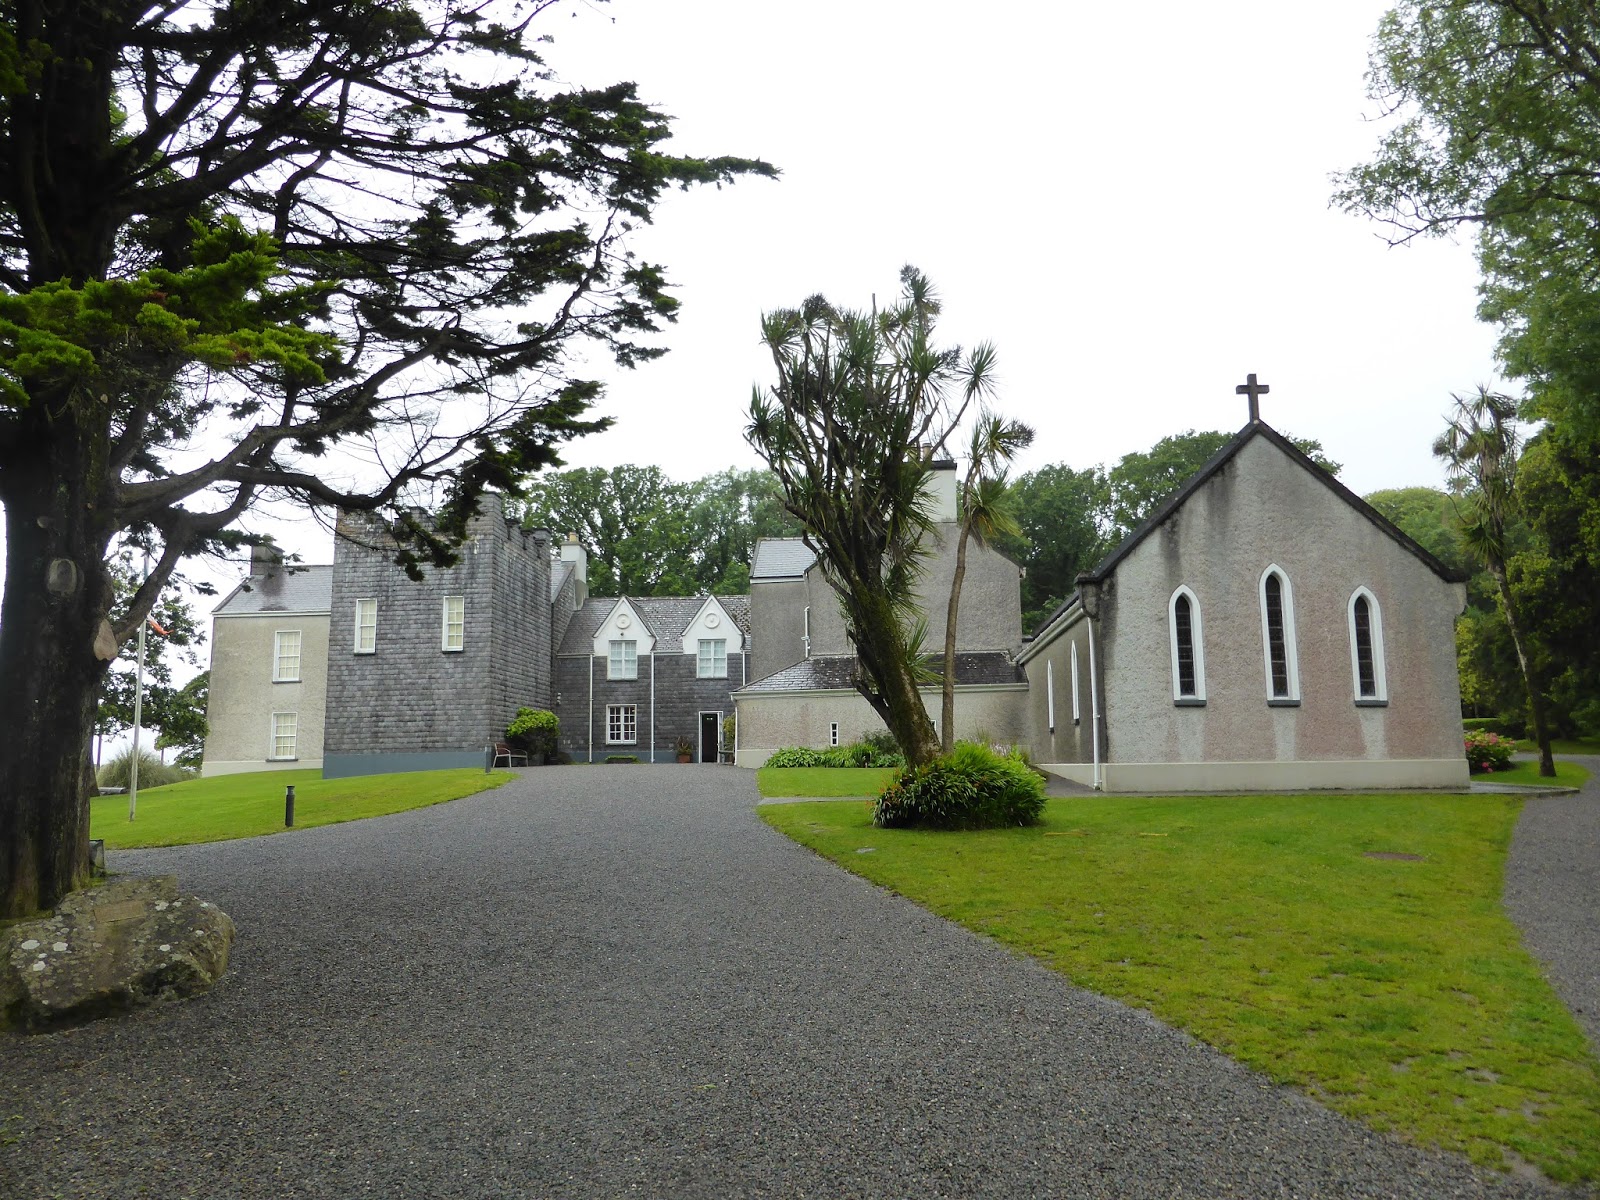
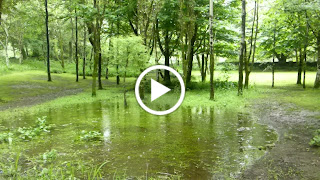 |
| The grounds at Derrynane House |
We decided to come home one day early based on the weather report which saw another wave of rain and wind coming through the area. We made a straight run home this time and with no stopovers, and despite all the tribulations I am having camping withdrawals already.
Thank you to Mortimer and Pat of Mannix Point for having me yet again and I can't wait until the next time.


An overnighter in Adare
My son and I were taking our main holiday, 2 weeks in mid July, in Mannix Point in Co. Kerry where we as a family have been twice before. My other son was working and was staying at home with a Grandmother nearby.
To break up the long journey we decided to stop over at Adare Camping which was on the route to Mannix Point. We took a road down the Western side of Ireland, a road that has seen vast improvements due to heavy investment by the Irish Government with the aid of European Funding. And so it was that we took a stretching legs break at Knock which is an ancient pilgrimage site for Roman Catholics from all over the world, with a huge Basilica and well kept Chapels and ornamental gardens.
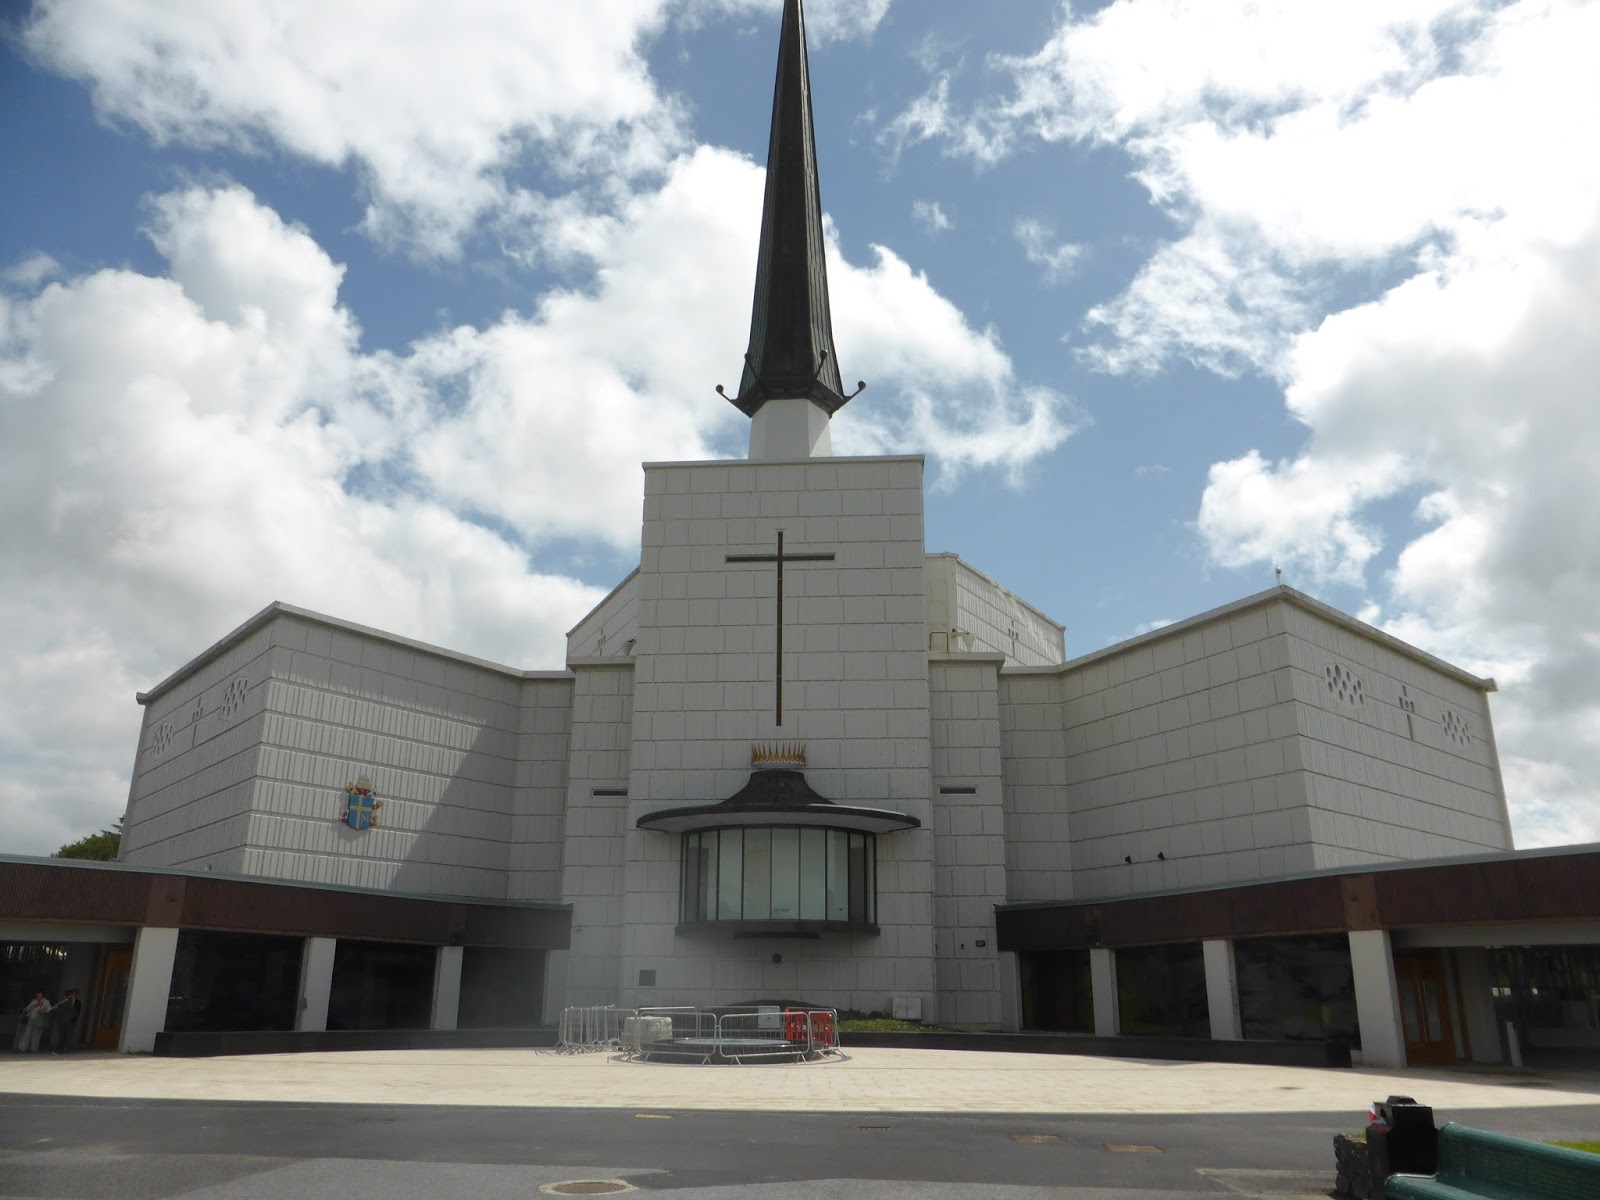
The interest for me was more of interest rather than a pilgrimage and it was good to get out of the car after a two and a half hour drive. I found the buildings architecturally interesting and loved the art work in the windows.

The campsite in Adare was another two and a half hours drive on and the roads were either motorway, dual carriageways or very good surfaced, wide roads with climbing lanes. There was no impediment and even though we apparently passed the cities of Galway and Limerick we didn't so much as see them, sailing round them whilst negotiating a few roundabouts.
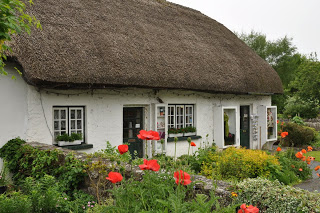
The first time we had to sit in traffic was at Adare itself, being a few miles south of Limerick. The village is very pretty, having been the village built around a large estate and the houses are mainly thatched cottages. The reason for the traffic was apparently people like to do a lot of rubbernecking whilst going through Adare and also being a busy village it's just a bottleneck for all traffic going further south.

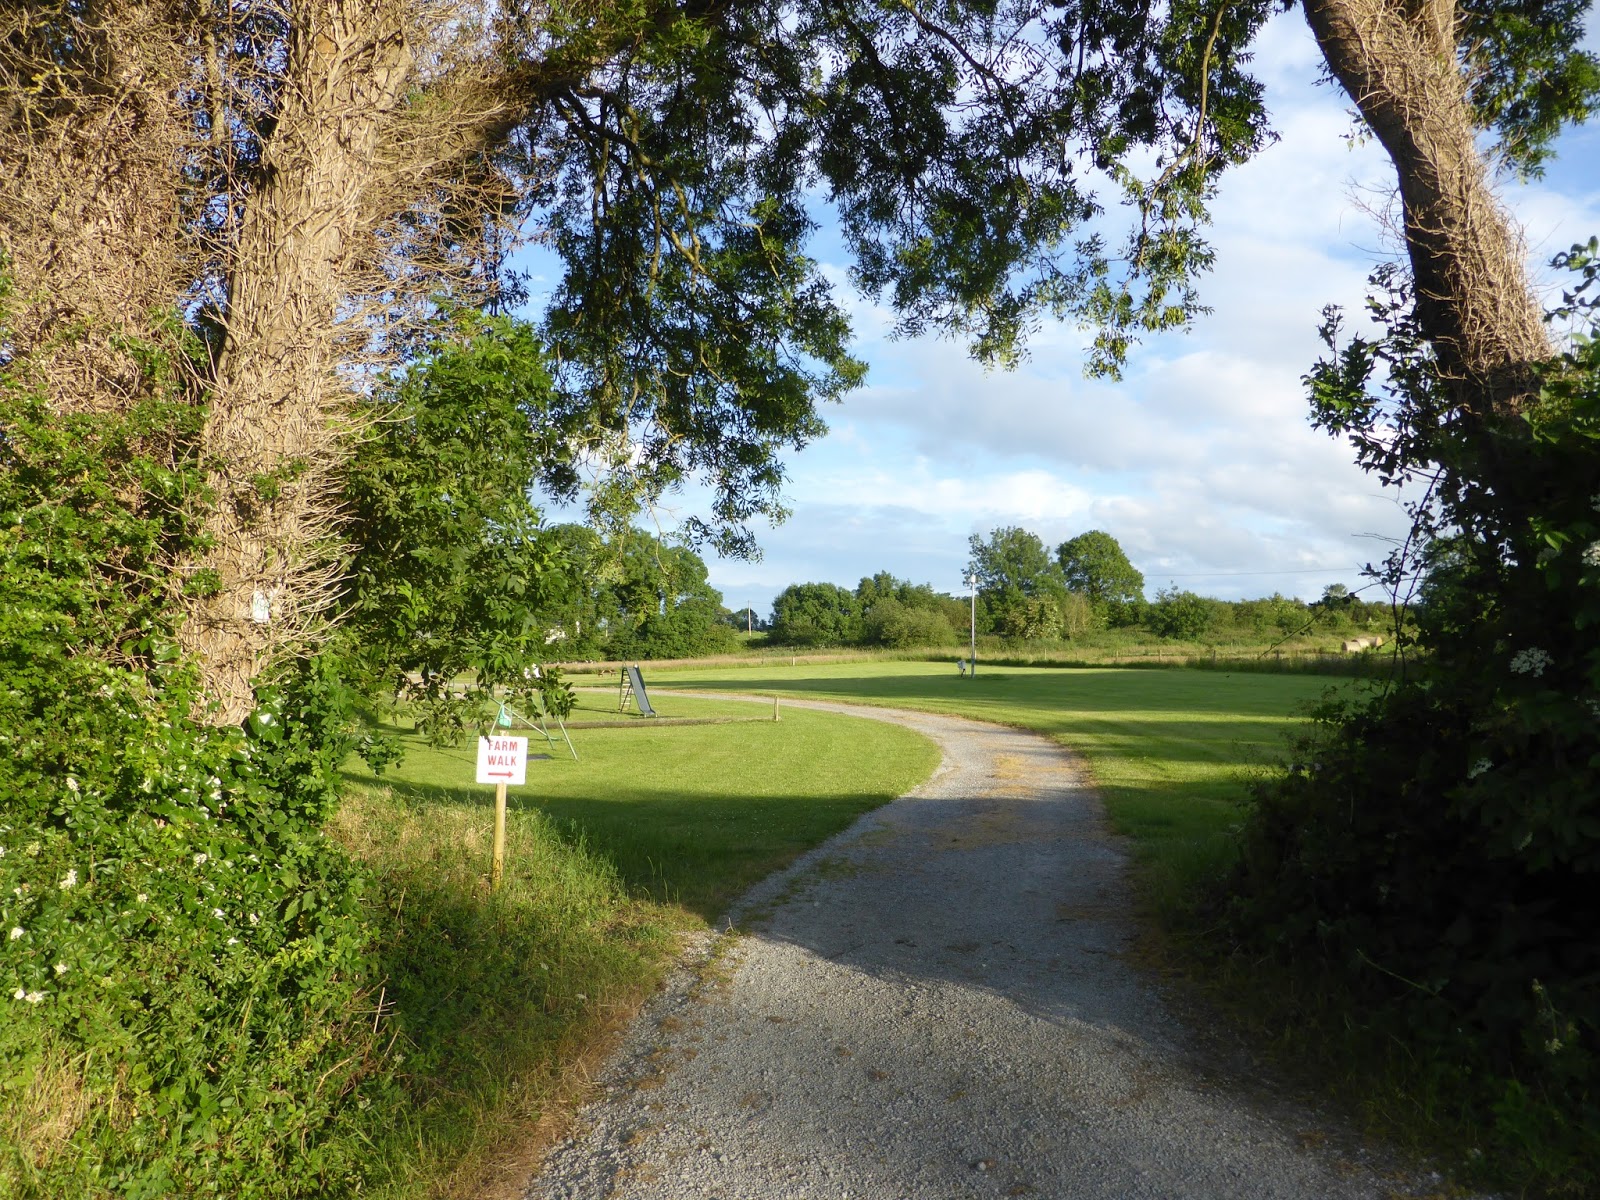
A mile or so past the village, turn left, turn left again and there is Adare Campsite. It is a lovely, small to medium sized campsite in tranquil countryside. The site is well tended, the grass short and the hedges trimmed. The owner, Hugh, charged me €10 each which I thought was a little on the steep side for what is in effect, a backpackers tent. I could have argued backpackers rate but it wasn't worth getting the owners back up.
We had brought a Vango Halo tent which is a tent popular with bikers and backpackers because of it's small and lightweight pack size. It was the first time we pitched it and there was a little bit of scratching of heads as it is a geodesic tent (i.e. crossing poles) with an inner you have to attach from the inside. I have left the inner attached now and will probably not detach it again unless I really have to. The inner tent is orange and the fly is green and this tent is unique in that it has doors which are designed to be opened within one arm movement in an arc. There are one of these doors on each side so two people get their own door and this also aids cross ventilation for when the sun beats down and heats it up inside. It is also tall enough to sit up in cross legged and there is storage space for boots and bags etc outside the inner but under the protection of the fly sheet. I was seriously impressed how roomy it was inside.
We had brought tea with us, bagels which we toasted and slathered with philidelphia cream cheese and smoked salmon. We were able to use the campers kitchen which in this case is a large tin shed, with a wood burning stove and a picnic table. Around two of the the sides are worktop and there is a kettle and somewhere to plug in your phone to recharge. There is a sink with running water. It is quite basic but more than adequate and you could feasibly take shelter in there in the rain.
There are a couple of dishwashing sinks on the main amenity block which are under a roofed area and the loos were spotless, and the cubicles roomy enough to get changed in. I normally don't change in toilet cubicles but this time, being in such a small tent I was glad of the space and also how clean it was.
We went in to Adare village later for a walk around and admire how pretty the village is kept. There was one burnt out cottage which Iv'e been informed since was due to an electrical fire and I'm also told it will be sorted out ASAP as it is a blot to the look of the village.
Here's some pictures of the campsite:
 |
| Sun going down |
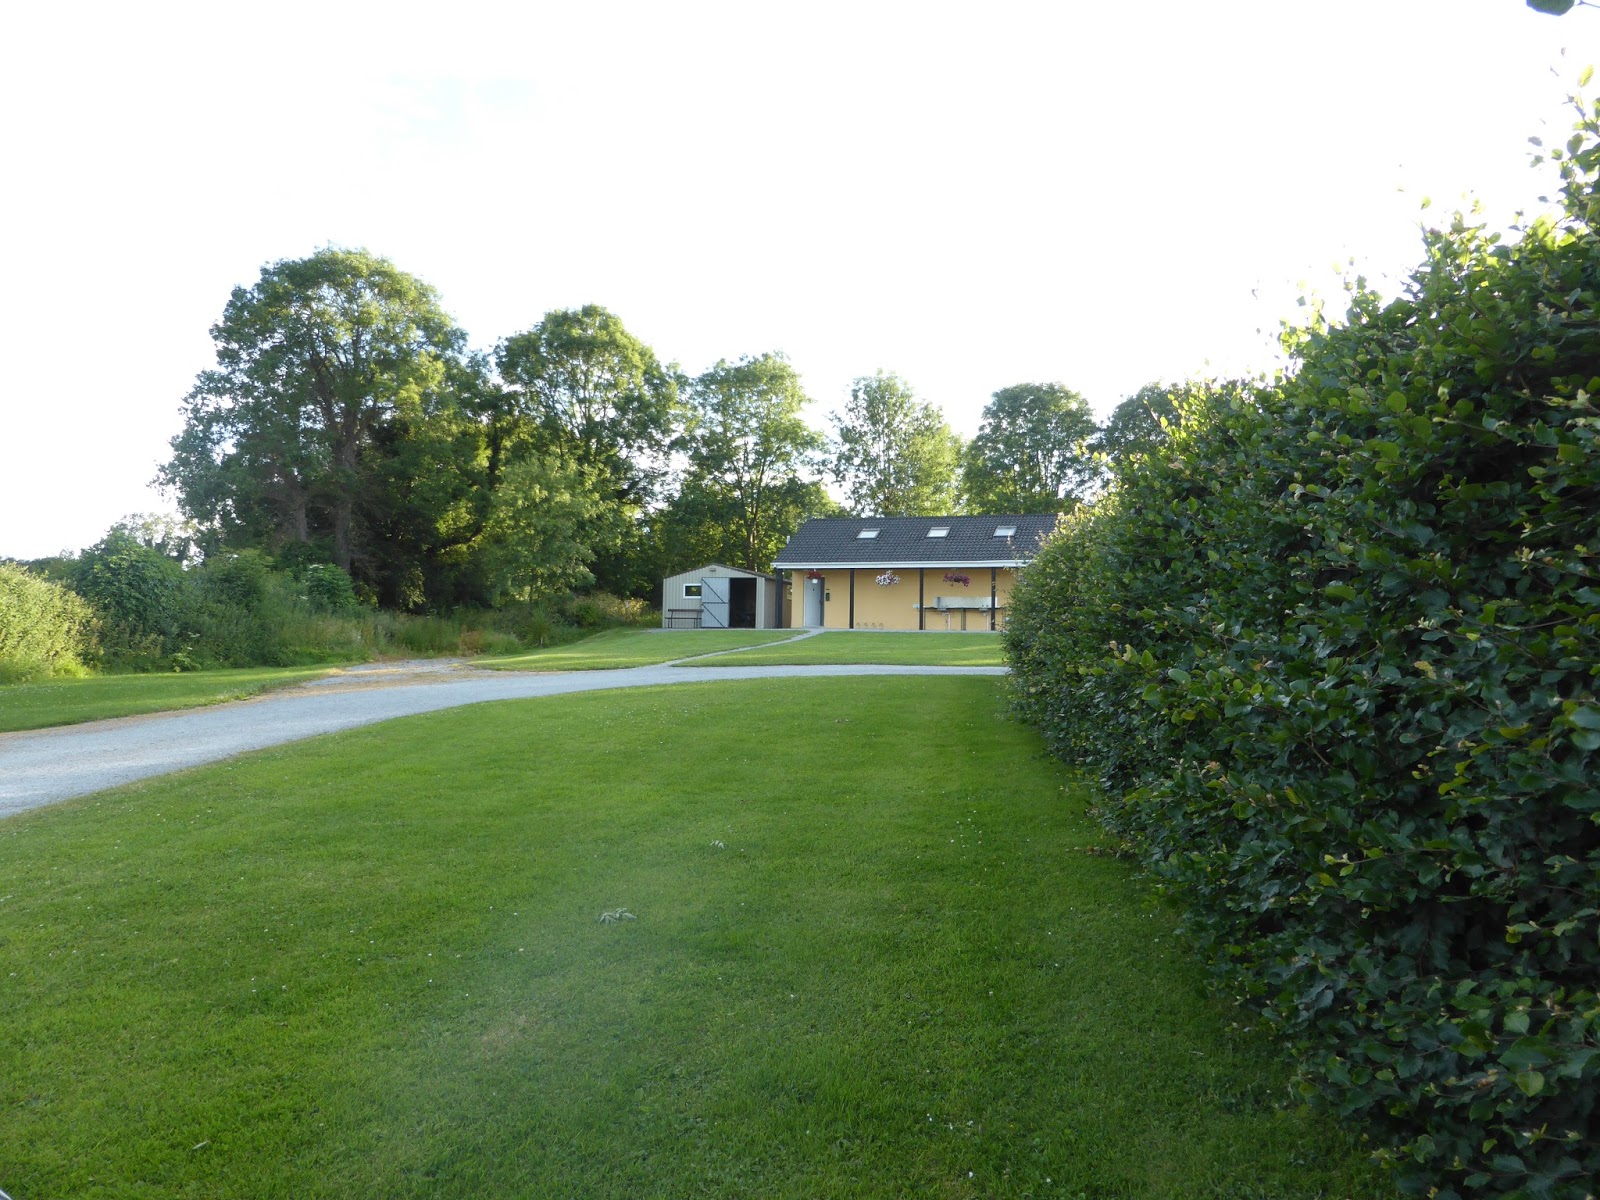 |
| Facilities and campers kitchen in shed. |
 |
| My son having a sleep in the following morning |
 |
| Taken first thing the following morning with the Owner watering the hanging baskets. |
Subscribe to:
Posts (Atom)
